Coding instructions
Share your project's coding rules, connect your coding tool, and keep the team working from the same instructions.
Coding instructions tell your coding agent how your team works: which commands to run, how to structure changes, and which project rules to follow. Keep files such as AGENTS.md, CLAUDE.md, skills, rules, and supporting scripts together, then connect your tool to the project in Fabric.
Start with a short entry file that names your team's coding conventions, the actual build and test commands, and any changes that need review. Put longer guidance in supporting files. Use the filenames and folder structure your coding tool expects.
Open your project's instructions
Choose Projects in the sidebar, open your project, and select Coding Instructions.
If your team has already connected a repository or published an upload, select a file in the tree to read it. For repository instructions, the branch and commit tell you which version you are reading. Commits opens the repository history; Download lets you take a copy of the instructions.
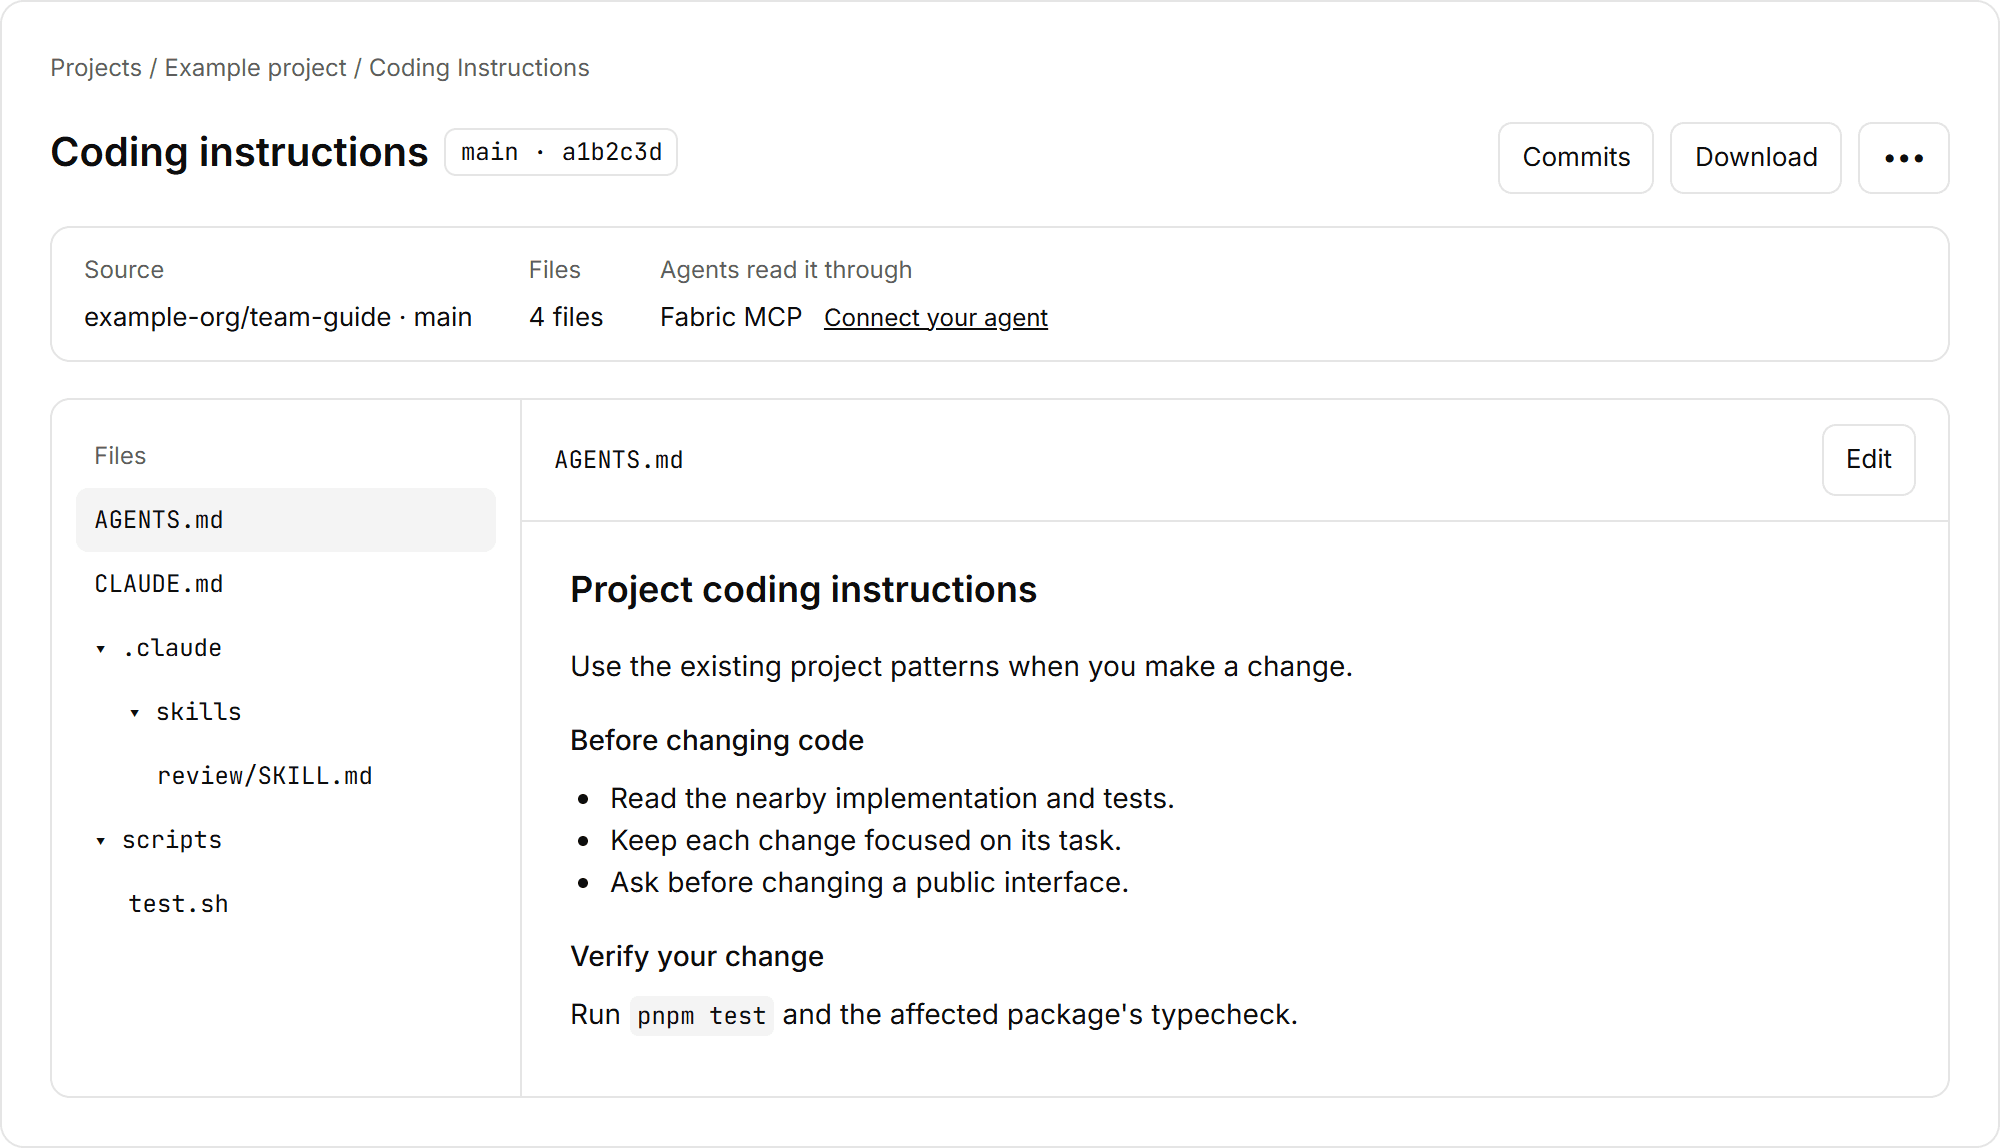
The illustrations use example project and repository data. Setup commands in your own dialog are specific to your project and Fabric address.
Add instructions to a project
If you only need to use instructions your team has already set up, skip to Connect your coding tool.
Use a Git repository
Use this option when your team already keeps its instructions in Git.
- Connect the repository to your project if it is not connected yet.
- In Coding Instructions, choose Sync from repository. To change an existing connection, open More → Settings and choose Change in the repository section.
- Choose the repository and branch. Select the folder that contains the instructions, or the whole repository if that is where you keep them. Review any excluded paths.
- Choose Save connection. Open a file to check that you selected the right folder and branch.
The files stay in Git. After someone commits or merges changes, use More → Refresh to load the latest branch version. Fabric reports Up to date. or Updated to the new commit.
Upload a folder
Use an upload when you have a folder of instructions to share without connecting its repository.
- Choose Upload folder, then Choose folder or Choose files. You can add more files before uploading.
- In Review what will be uploaded, check the included files and greyed-out exclusions. A
.fabricignorefile can exclude files your agents do not need. - Resolve any rejected-file warning. Credential files do not belong in an instruction upload.
- Leave Publish as soon as the upload passes checks selected for the usual setup, then choose Upload with the displayed file count. Wait until the version is published before asking teammates to use it.
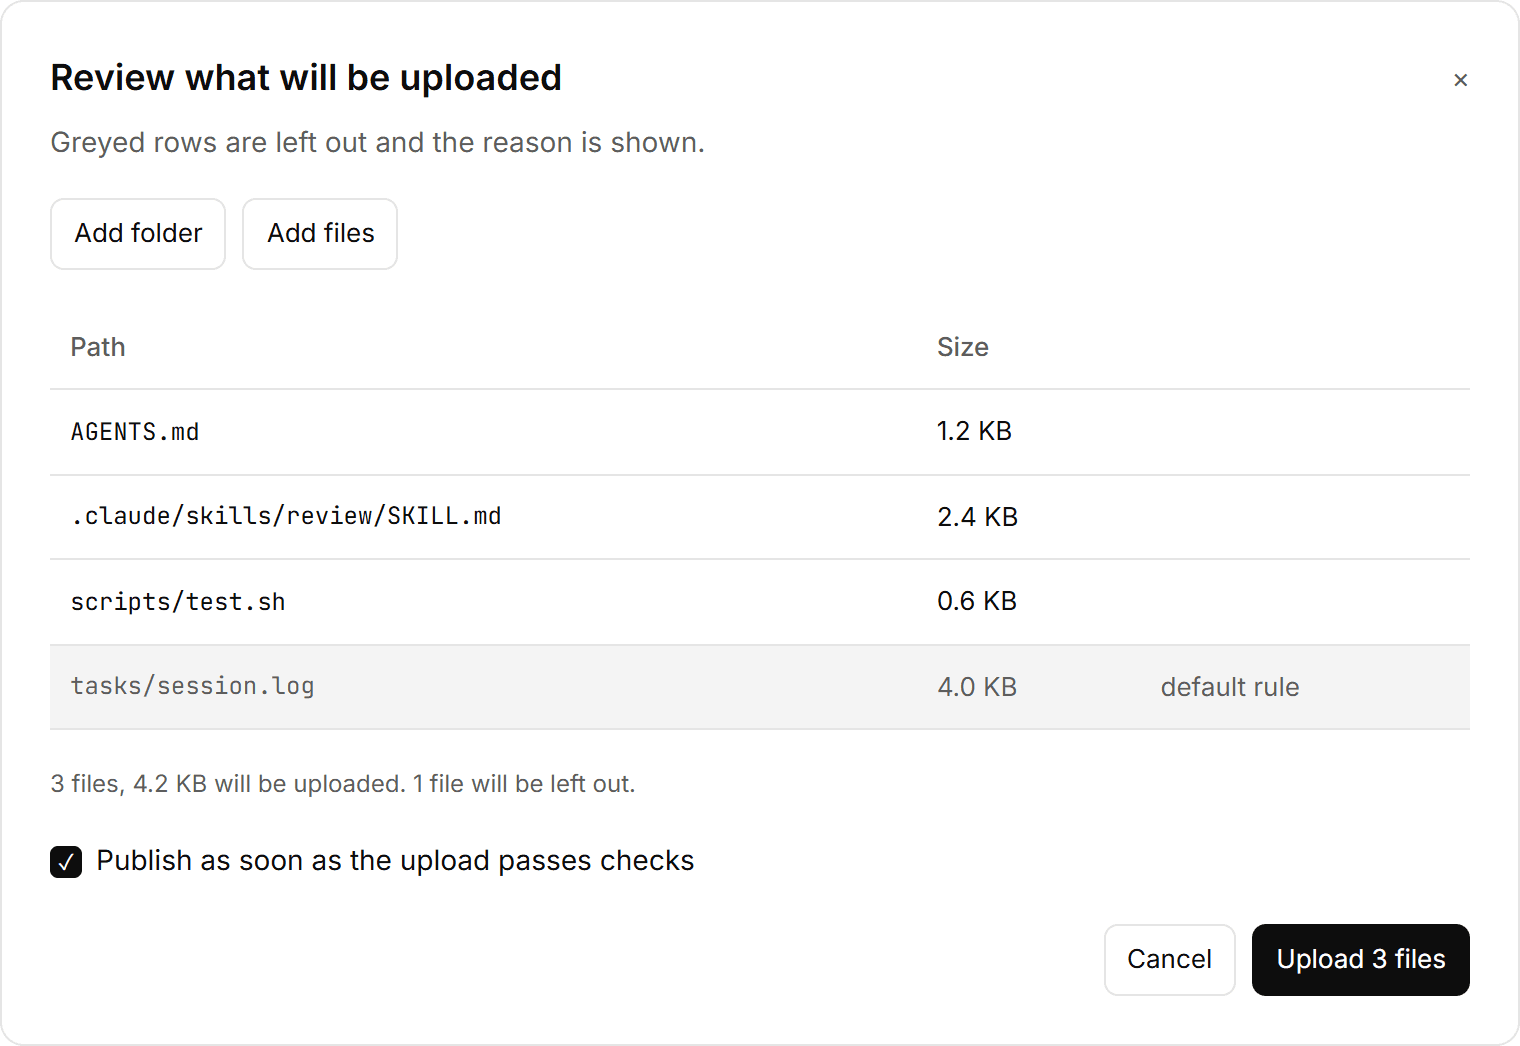
If your browser cannot choose a folder, use Choose files or try a browser that supports folder selection, such as Chrome or Edge.
Connect your coding tool
Open Connect your agent from the Coding Instructions tab. The dialog is called Connect your coding tool. Choose the tool you actually use; the instructions and setup line change with that choice.
For Claude Code or Codex:
- Make sure Node.js 22 or later is installed.
- For repository instructions, choose No clone (recommended) if you want the project's plugin to deliver the instructions without a separate instructions checkout. Choose Already cloned if you already work in that repository, or Clone it for me to create a checkout.
- Copy the setup line from your own dialog. Run it in your terminal, in the folder indicated by the dialog. Use the whole line; it includes the correct project and Fabric address.
- Approve the sign-in in your browser, then return to the terminal and finish the plugin or hook steps shown for your tool.
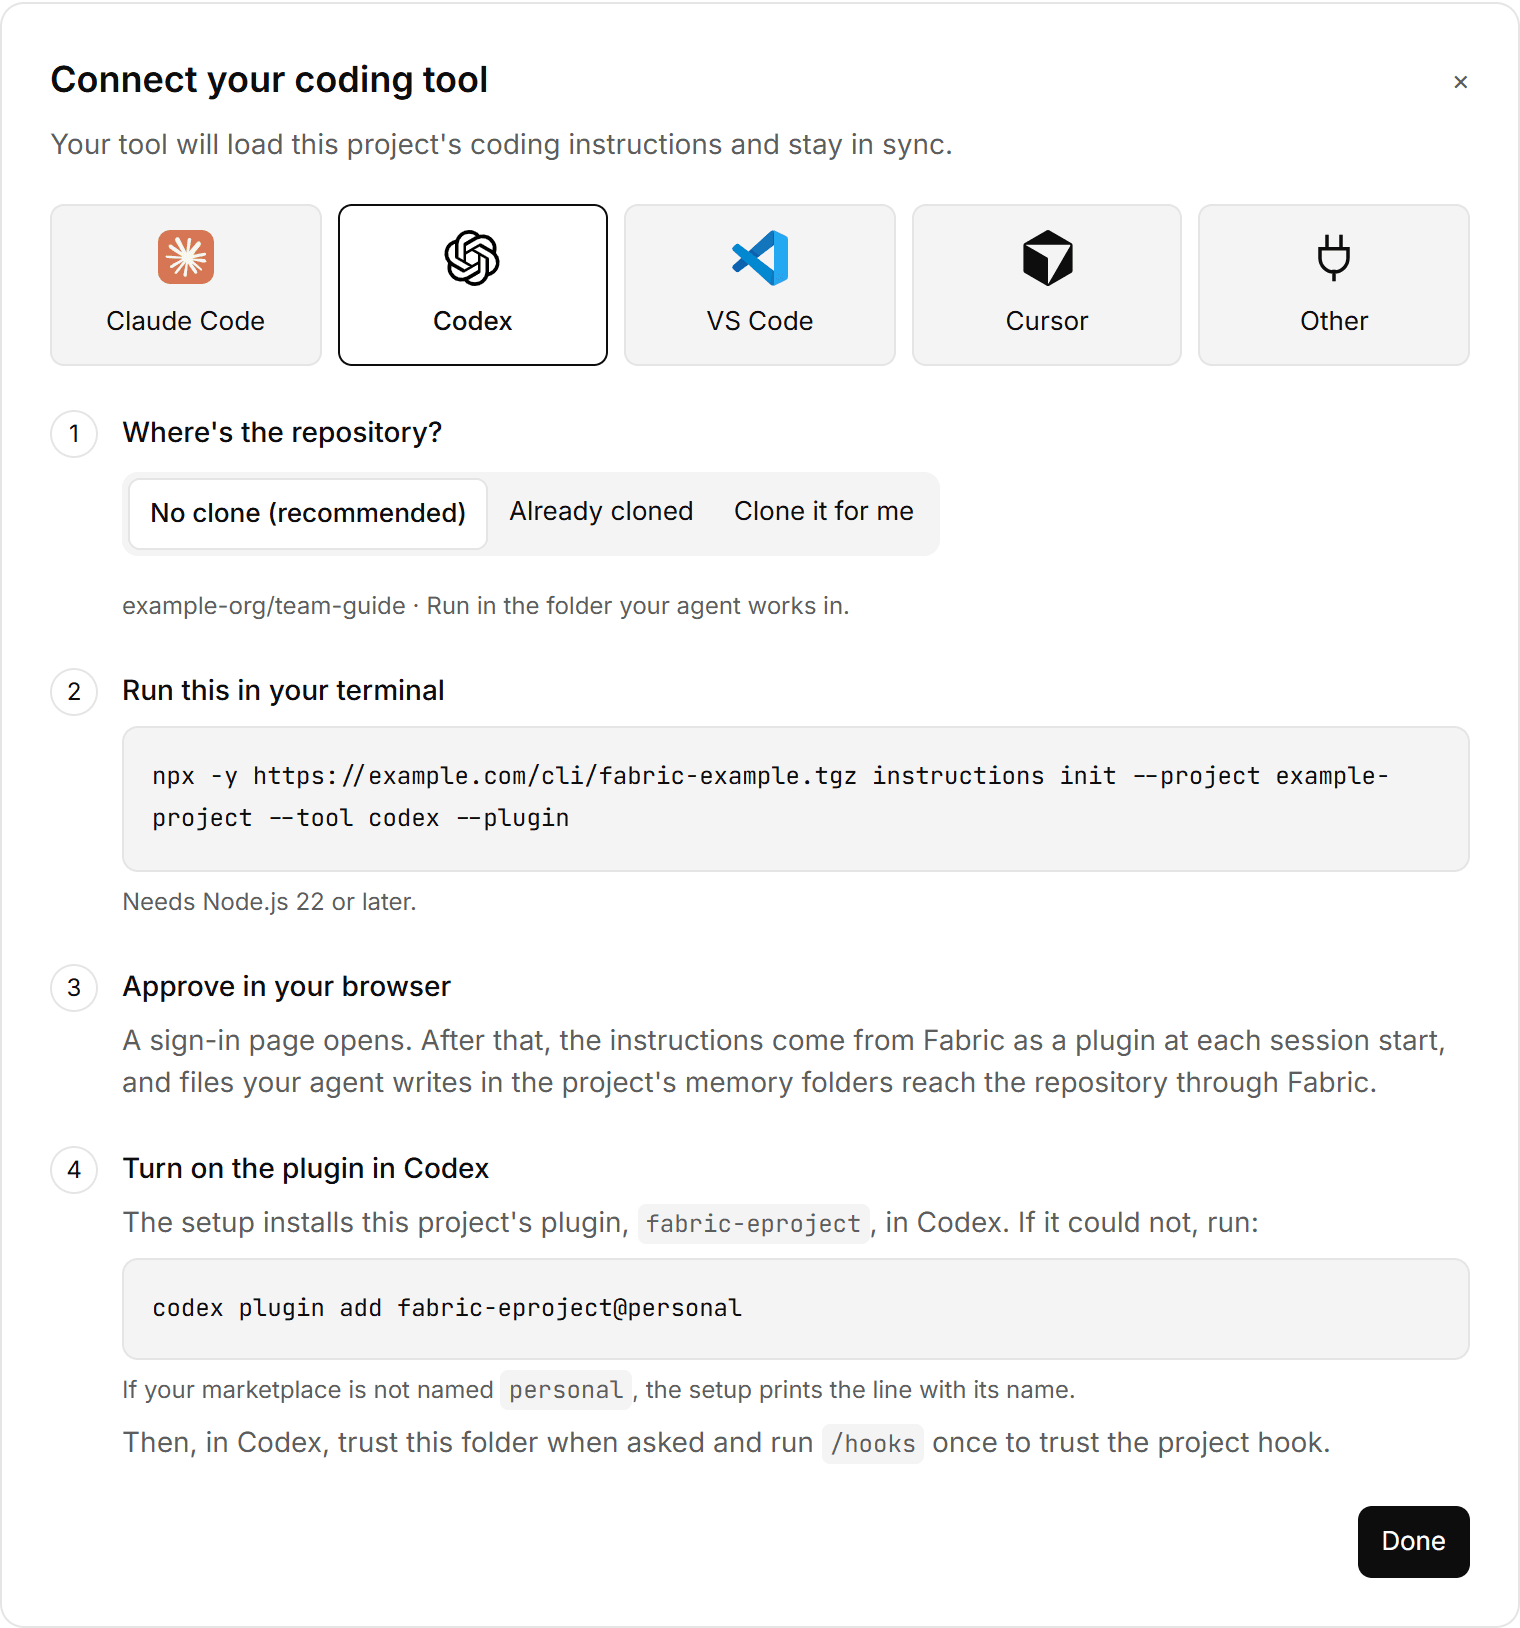
With No clone, the plugin supplies the instructions when a coding session starts. Claude Code may ask you to approve the plugin installation in your own terminal. Follow the dialog's /mcp and Authenticate steps to let it use Fabric tools. For Codex, the setup installs the project plugin and prints a fallback command if it cannot finish. In both Codex setup modes, trust the folder when asked and run /hooks once to trust the project hook.
The plugin carries project skills, agents, commands, and the Fabric MCP connection. Fabric also delivers the project's rules and session instructions. Supporting files inside a skill travel with it; standalone scripts, settings, and knowledge files are left out. The Coding Instructions tab lists omitted files and their reasons. See Instructions as a plugin for the supported layout and tool-specific setup.
With a native checkout, the session-start hook can fast-forward a clean matching checkout to the configured branch. It reports when it cannot update the checkout. Keep local edits safe and resolve any reported Git issue before trying again.
If Fabric says one-line setup is unavailable, follow the MCP connection instructions shown in that same dialog. Other tools, including Cursor and VS Code, have their own connection steps there.
Check that your agent can use them
Start a new coding session after setup. Ask:
Read this project's coding instructions before changing code. Summarize the rules and test commands that apply to the change I am about to make.
Check that the answer names the files and rules your team expects. If the tool cannot read them, check its Fabric connection and project access before starting the change.
Save specs and notes to Living Memory
The plugin also includes the fabric-living-memory skill. It tells your agent where to save specs and task notes so Fabric can send them to the project's repository and bring them back as Living Memory for other agents.
Choose where files go
A project administrator sets this up once:
- Connect a repository to Living Memory in the project's Context tab.
- Open the menu beside Sync now, choose Write folders, then Add a write folder.
- Choose a folder inside the repository selection, such as
docs/ai. Keep it separate from the coding instructions folder. If you type a path, choose Use to select it. - Keep Pull request for review before files join the branch. Choose Index for AI search if project search and summaries should use the files, or Store only to keep them readable without adding them to search and summaries.
- Choose Add write folder. Developers then run the No clone setup in the folder where their coding agent works, or start a new session if that folder is already set up.
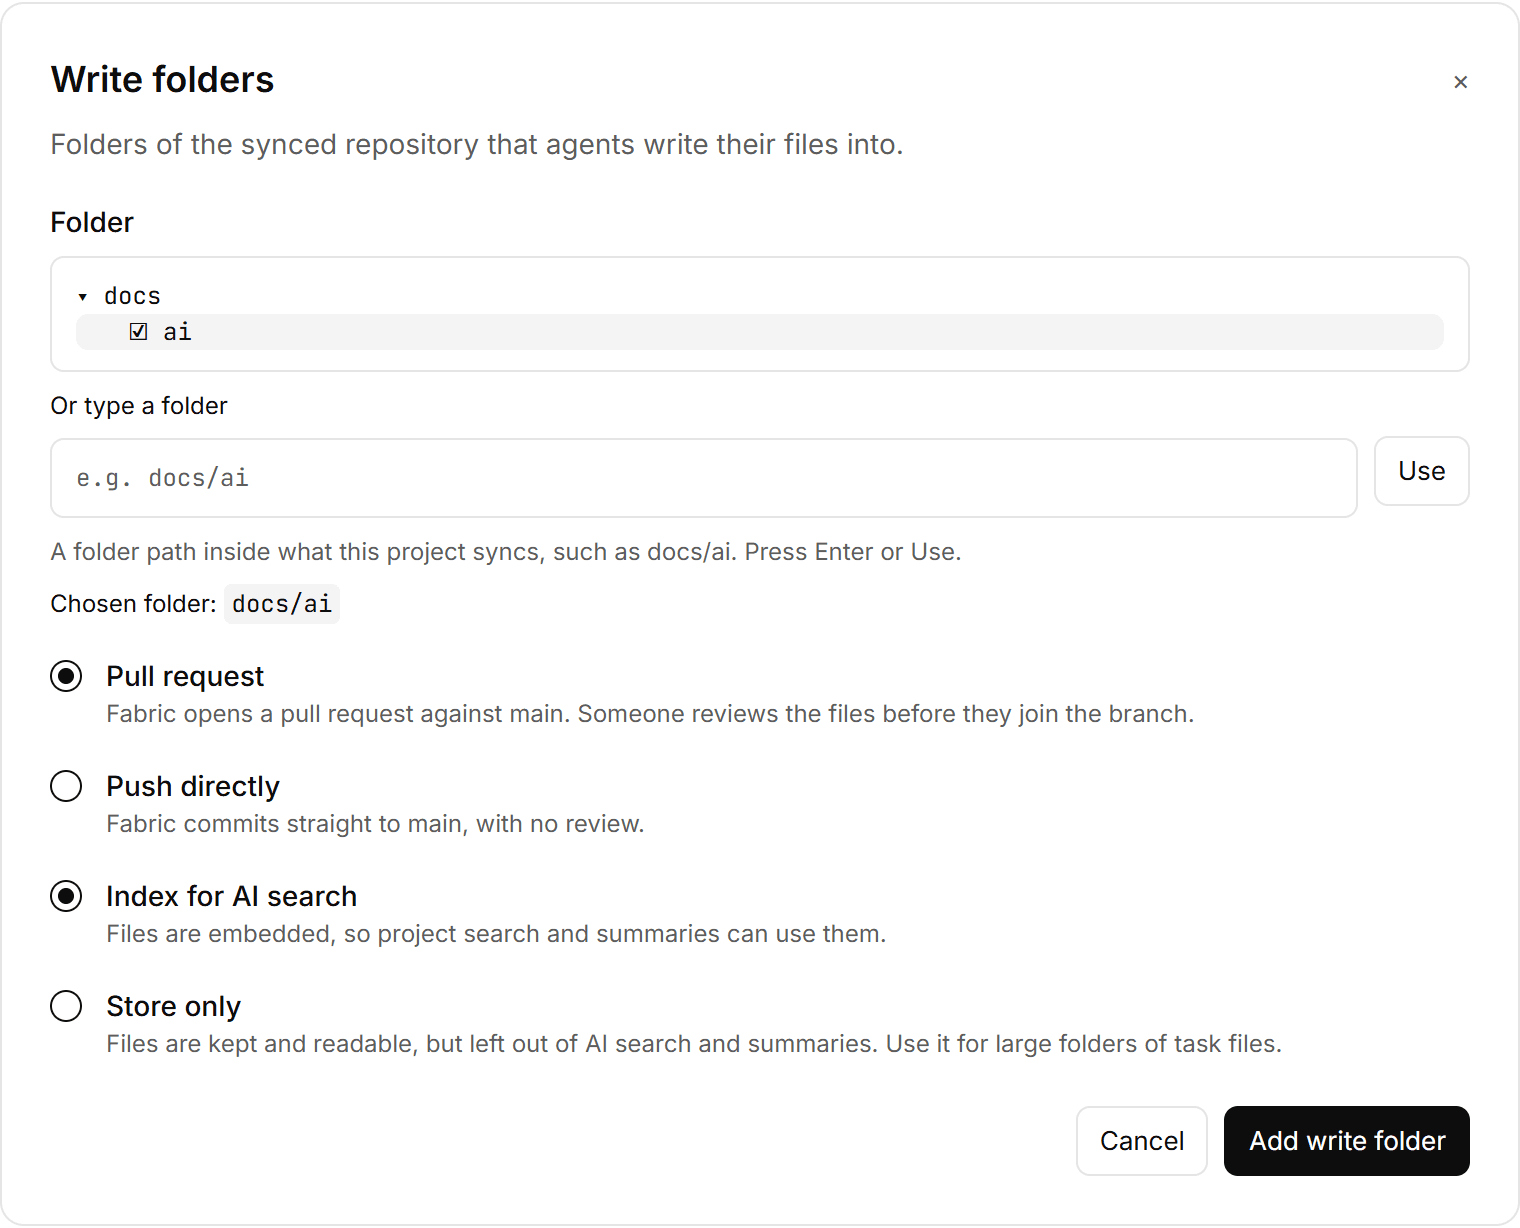
Project admins and owners can enable Push directly instead, which commits files without review. The write-folder settings guide explains that choice, folder restrictions, and Store only.
Write, review, and resume
Add the intended output path to your team's coding instructions so skills and agents save their work in a configured write folder. For example, if docs/ai is configured, ask:
Write a spec for password reset and save it to docs/ai/specs/password-reset/spec.md. Use this project's Living Memory instructions.
The agent writes an ordinary local file. The same path is used in the repository, and the setup keeps the mirrored files out of your own commits. Files outside the configured write folders stay on your machine.
| Tool | When files are sent |
|---|---|
| Claude Code | The hook sends changes when the agent's turn ends. |
| Codex | The hook sends changes when the next session starts. |
To check delivery, run memory status with the same CLI launcher and Fabric address used by your setup line, from the folder you set up. For example, if setup began with npx -y <tgz>, use that same prefix before memory status. The result reports pending changes, pull-request links, and any conflicts or refusals. Codex users who need to send changes before the next session can run memory push with that same prefix.
Open any reported pull request, review it, and merge it through your Git provider. A file in an open pull request becomes Living Memory after the merge and repository sync. Use Sync now in the Context tab to refresh it, then check the file there. The next coding session brings the committed files into the local mirror; an agent can also read them through Fabric's memory tools, including files marked Store only.
Local edits are preserved if a remote change conflicts with them. Read the CLI's report before resolving the conflict. See Save specs and notes to the repository for delivery checks, supported file types, conflict recovery, and a complete example of a teammate resuming the work.
Change instructions with your team
Instructions kept in Git
Edit in your normal Git checkout, or open a file in Fabric and choose Edit if you have permission. After editing in Fabric:
- Commit to the displayed branch writes the change to that branch. Enter a commit message and check the branch before committing.
- Suggest as a pull request sends the change for review. Open More → Your proposals to see the Pull requests dialog, then follow the link to review and merge it in your Git provider.
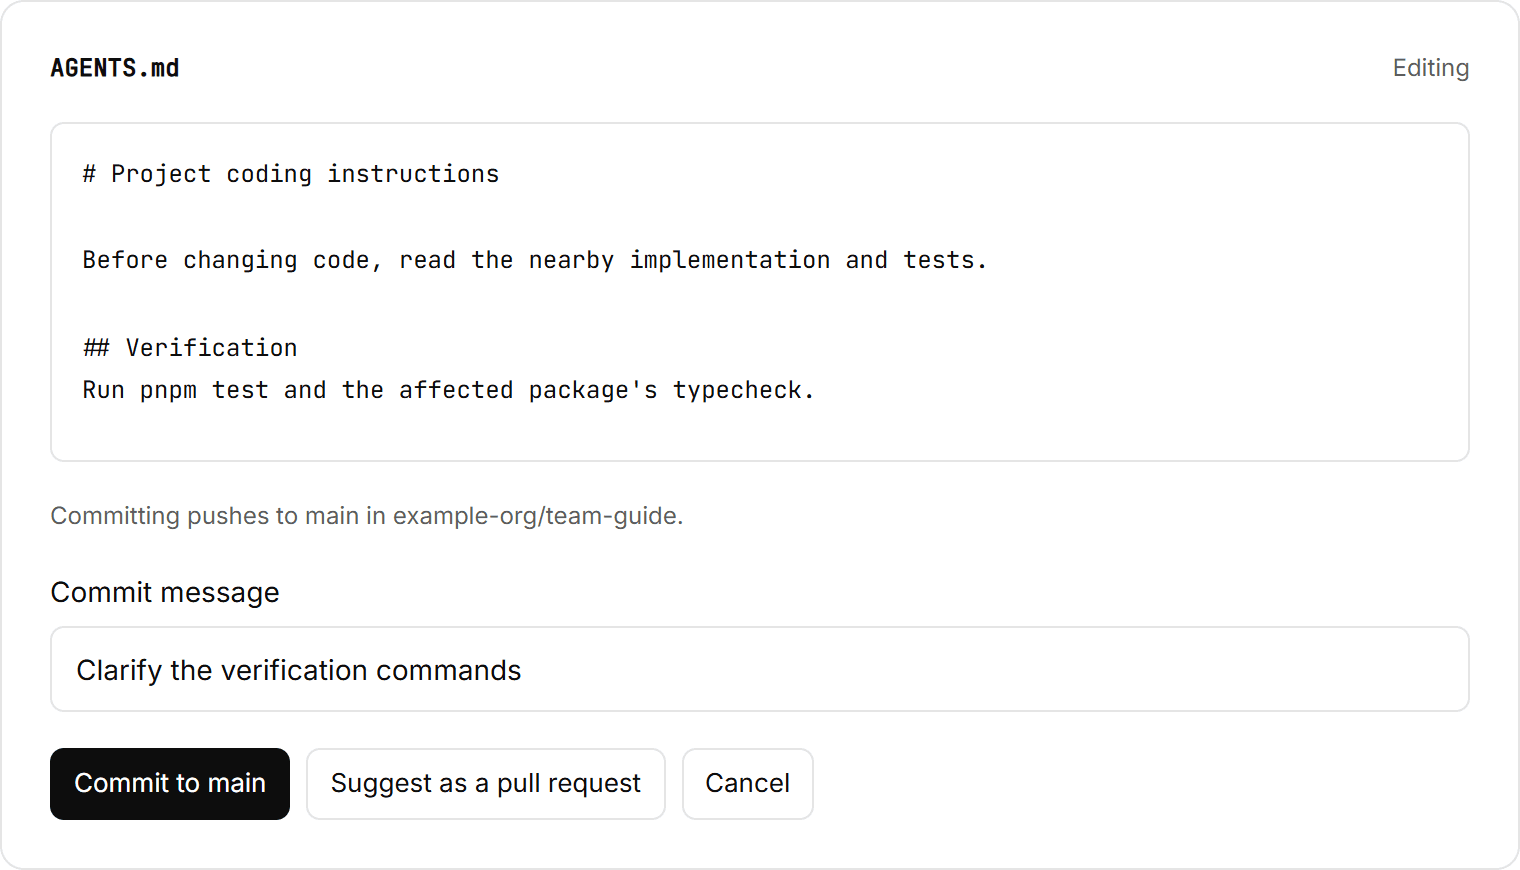
After a change lands, refresh the tab and start a new coding session to use the updated instructions. A Git-backed project uses the repository's commits and pull requests; it does not need a separate Fabric upload publication.
Instructions uploaded to Fabric
Editors can upload a new version or edit a file and choose Save and publish. To keep a change unpublished, use Save as a new version. If you can suggest changes but cannot publish them, submit a proposal for someone with review permission. Review proposals opens those suggestions; History lists uploaded versions and their download or publication actions.
When something is missing or out of date
| What you see | What to do |
|---|---|
| No instructions yet | Ask the person managing the project to connect the instructions repository or publish an upload. |
| The folder is empty | Check the configured branch, folder, and exclusion rules. |
| Repository sign-in expired | Reconnect the repository in the project's repository settings, then refresh. |
| An upload is rejected | Read the file-level reason, remove the rejected content, and choose the files again. |
| Your agent uses older rules | Start a new coding session. If you use a checkout, also read the session hook's update result. |
| Claude Code's Fabric tools need authentication | Run /mcp, pick the plugin's Fabric server, and choose Authenticate. Older setups may need this once more after the server name changes to plugin:fabric-<id>:fabric; see the plugin setup details. This is separate from the setup sign-in used by the memory mirror. |
| A spec is still missing from Living Memory | Check that it is in a configured write folder, read memory status with your setup's CLI launcher, and check any reported pull request. In Codex, sending waits until the next session unless you run memory push. Merge the pull request and sync the repository before looking for the file in Context. |
| You cannot see a setup, editing, or review action | Ask a project administrator to check your access. Available actions depend on project permissions; guests cannot use this connection dialog. |